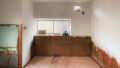
It is often said that the kitchen is the heart of the home, and in our house, that is accurate. For that reason, we wanted to install a functioning kitchen as quickly as possible after moving into the house.
Despite being infamous for its cuisine, Japanese kitchens are often small and lack the size and range of appliances commonly found in contemporary Western-style kitchens. Much of the food is prepared in pots or pans on countertop gas hobs or with a fish grill underneath.
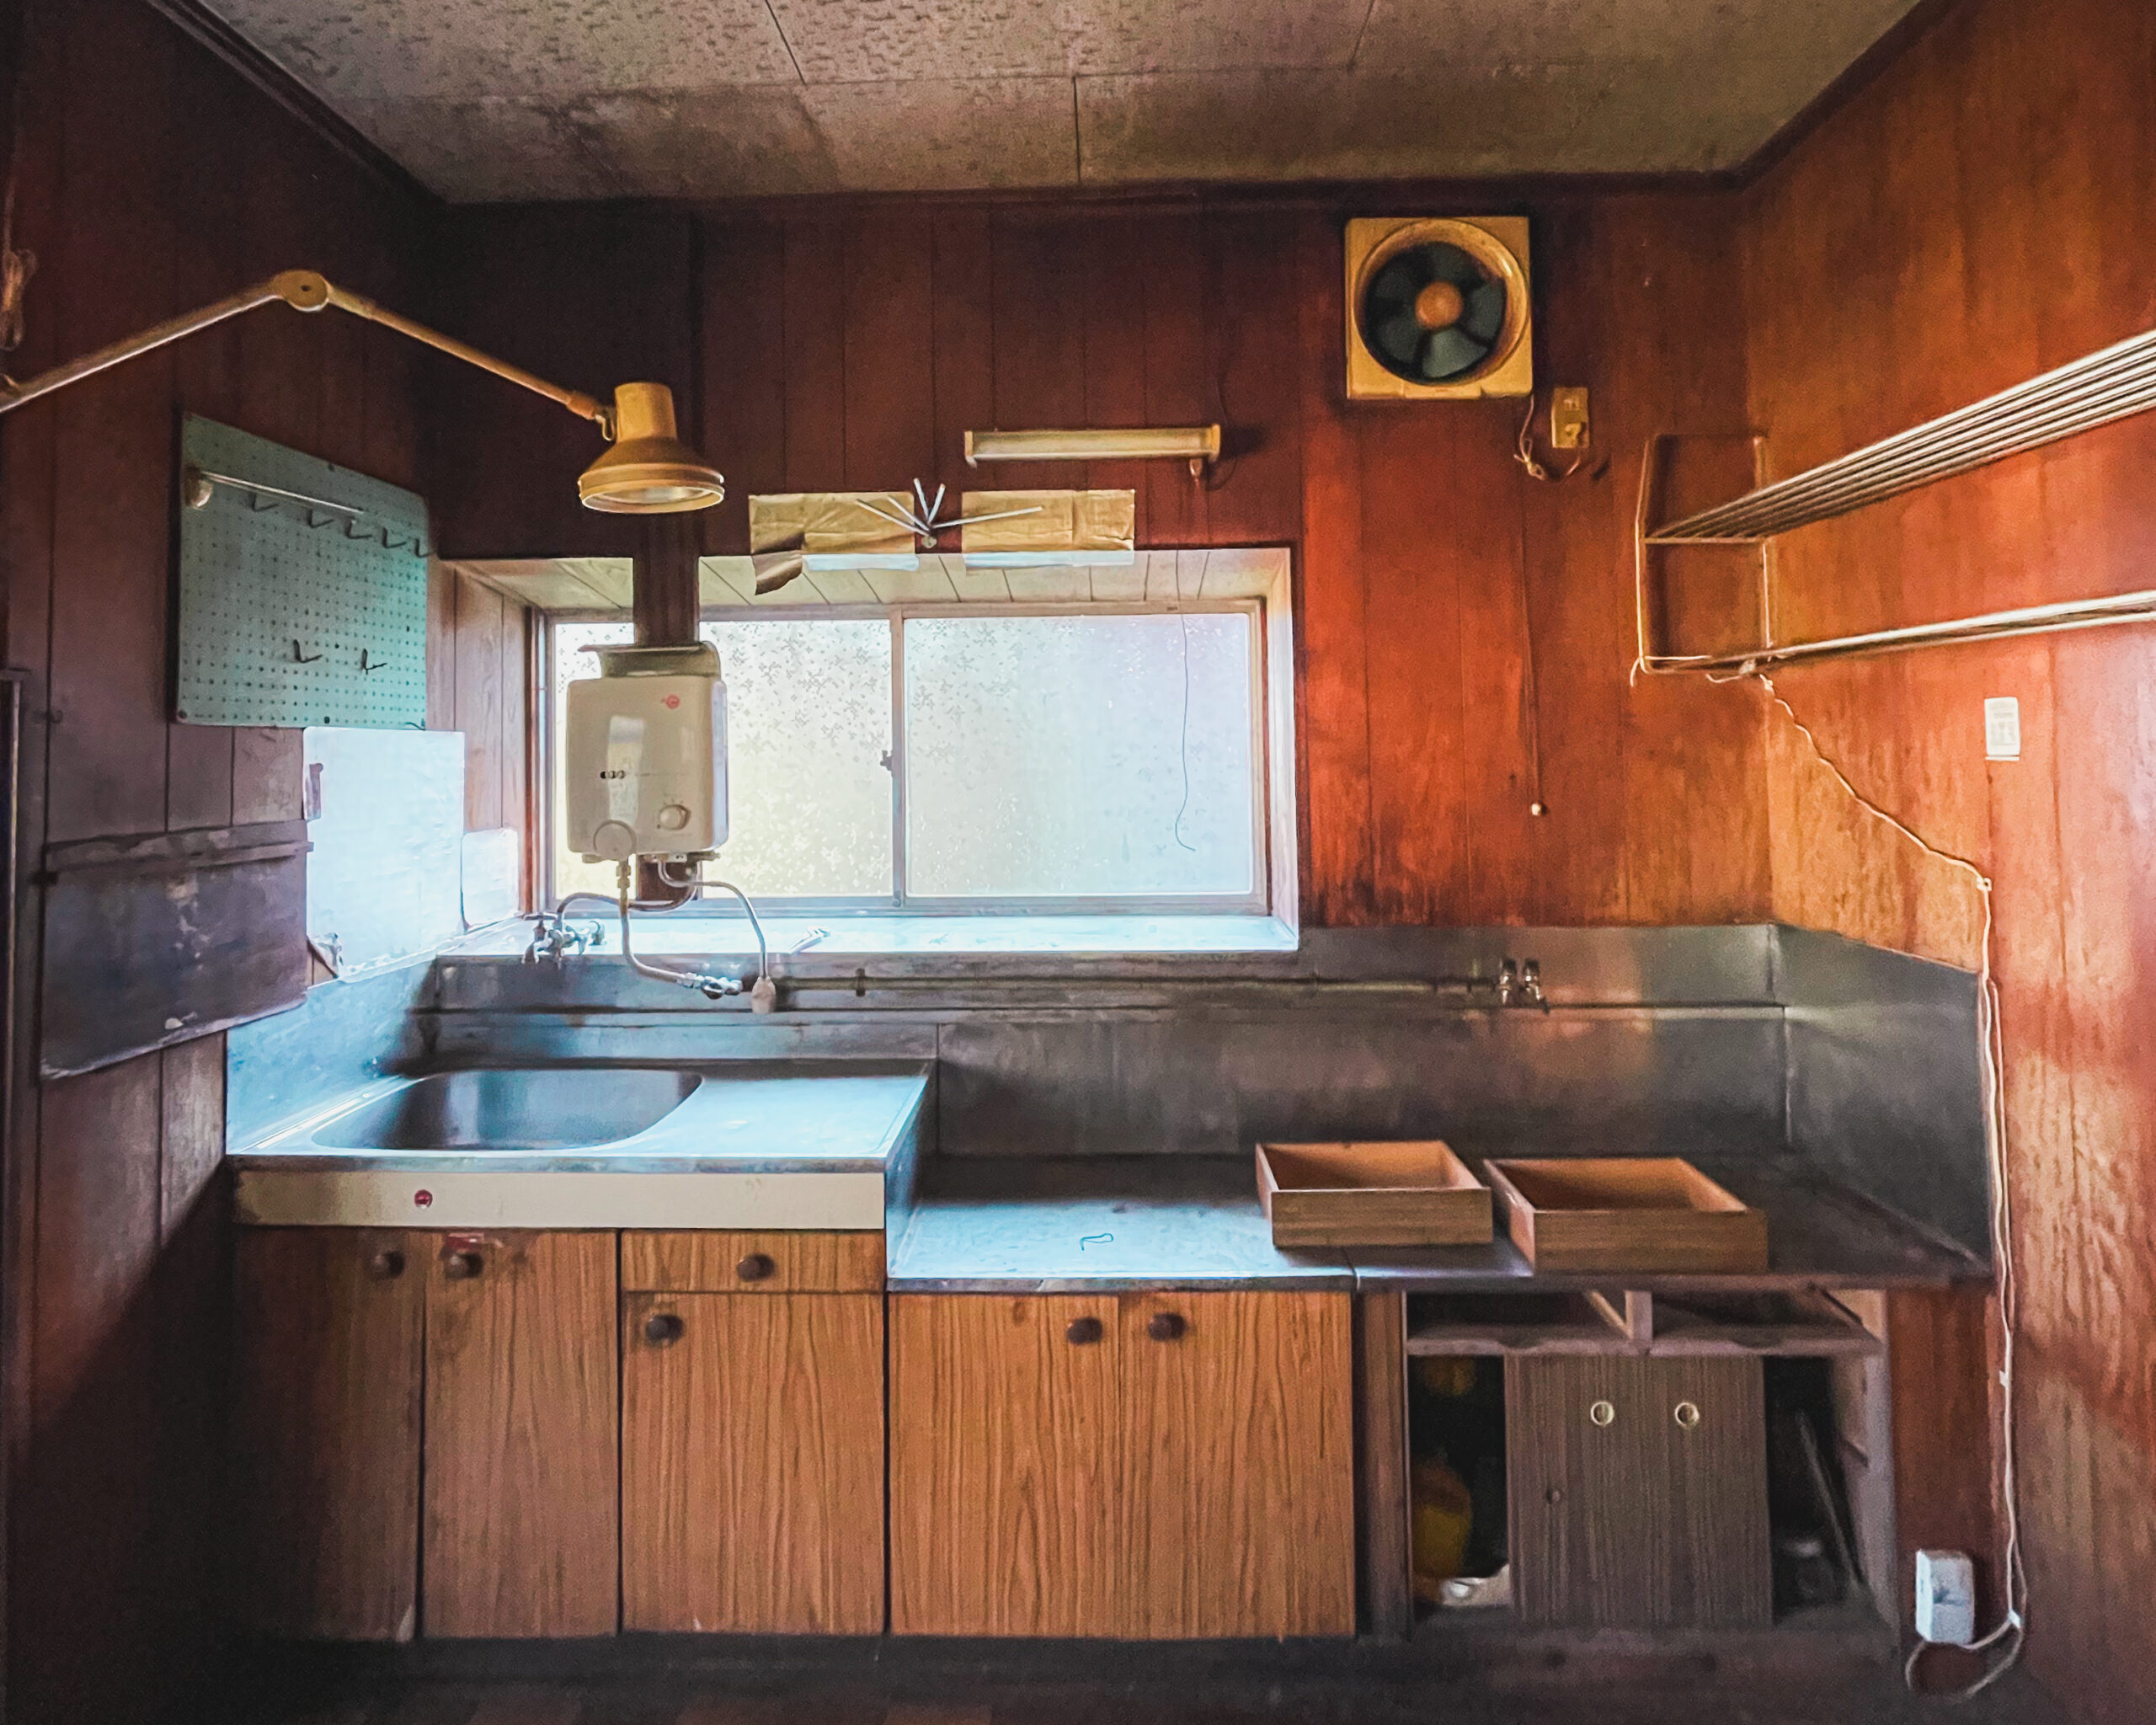
Our first step was to remove the old kitchen. This mainly involved smashing everything to bits and prying any tough parts from walls with a crowbar. We knew where our gas, water, and electrical lines were, and ensured they were turned off at the mains. Although enjoyable, the removal step can sometimes feel like taking steps backwards as the mess builds up. But, as the old saying goes, you’ve got to break some eggs to make an omelette.
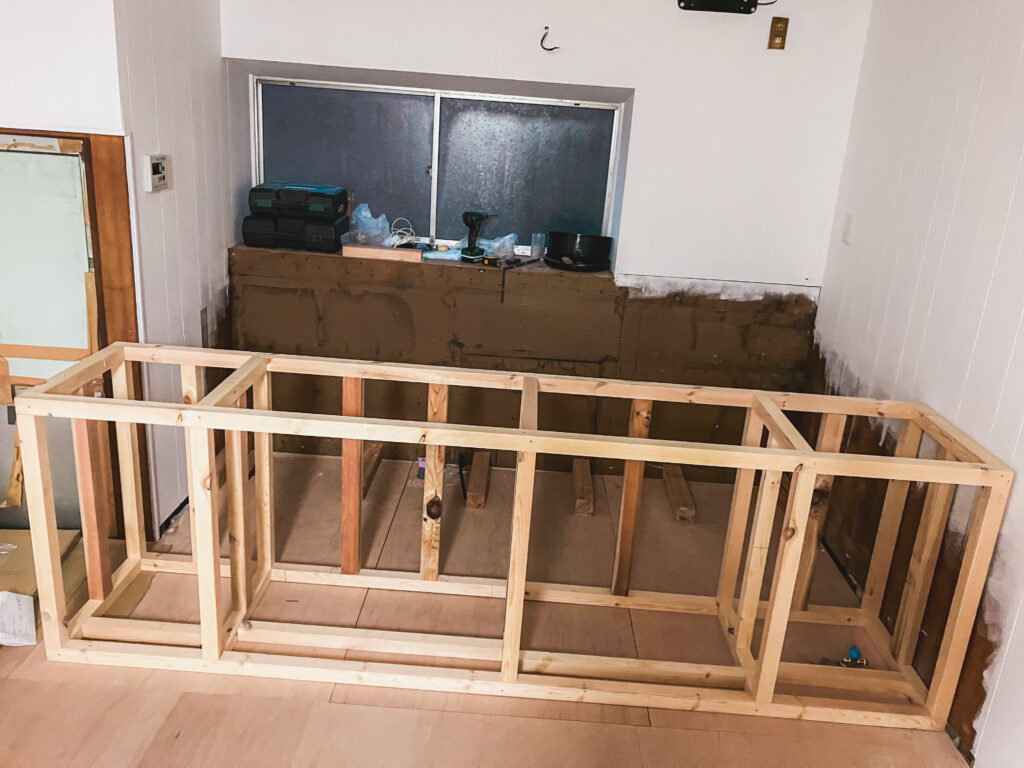
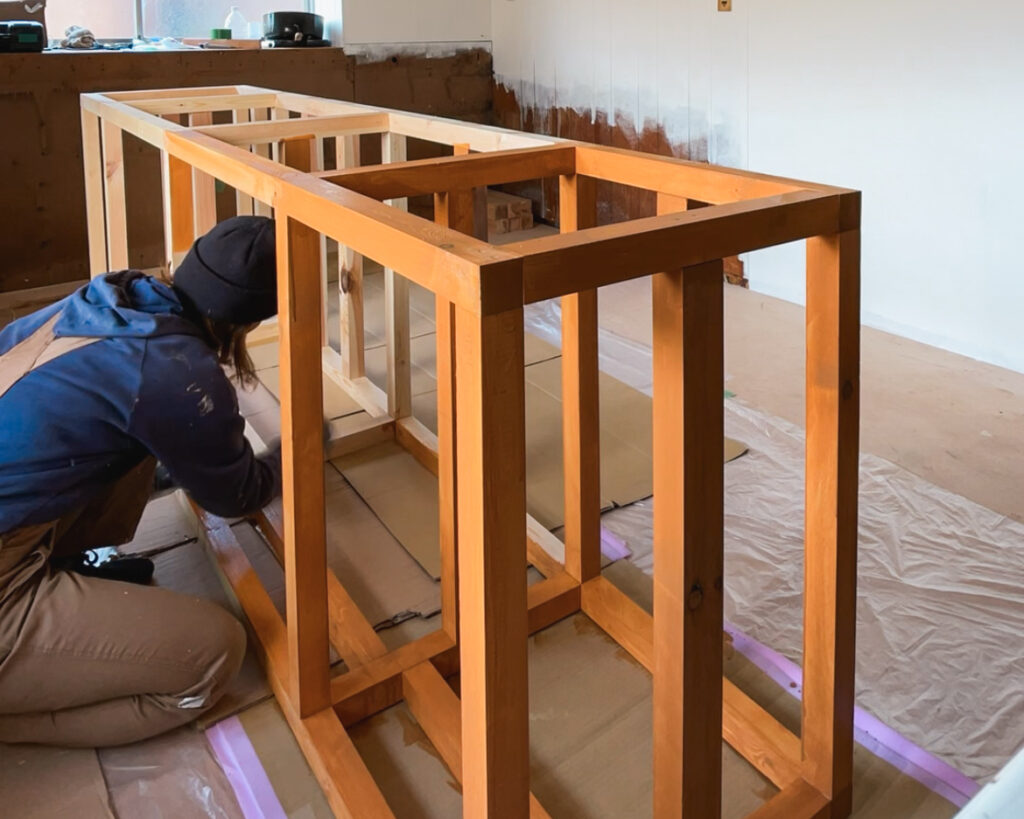
With the walls all cleared of the previous cabinets, we began marking the dimensions of where the new units would go. We marked where the sink and oven would be and planned the frame to incorporate our drawers and cupboards.
👇You can read about the first steps we took with our kitchen renovation here

As we are passionate about cooking and like to prepare a wide range of different foods, we wanted ample countertop space and a sizeable oven. We also needed to decide on the type of countertop we would like and how we would build a frame.
We opted for a corner counter plan to utilise as much space as possible. This included a wide sink to be placed in the middle, meaning we needed to have the water and gas pipes moved.
With everything marked on the floors and walls, we had a reasonable basis for the exact measurements for our cabinets. We also planned a toe-kick for the cabinets to give them a cleaner finish. We used 450mmx450mm framing wood for this. After cutting the wood, we assembled it with screws, before treating it with this product to help safeguard it against mould and decay.
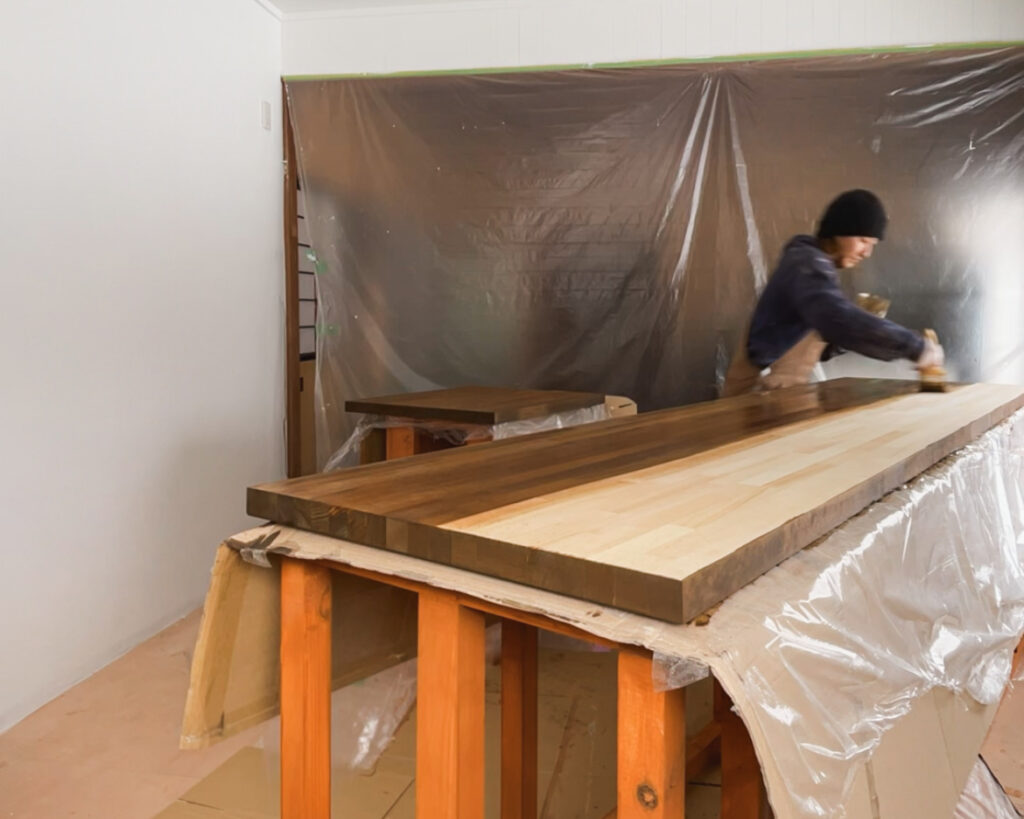
We ordered a pre-cut length of butcher’s block from Free Ita.com (フリー板.com). It was delivered in a well-wrapped box and was in excellent condition.
We then used WoodLove’s oil to treat both sides of the countertop.
When the oil had all dried, we fixed the counter to our frame and moved it into position. This took a great deal of squeezing and manoeuvering, with a fair few marks on the white walls, but all seemed worth it to ensure we got a nice tight fit.
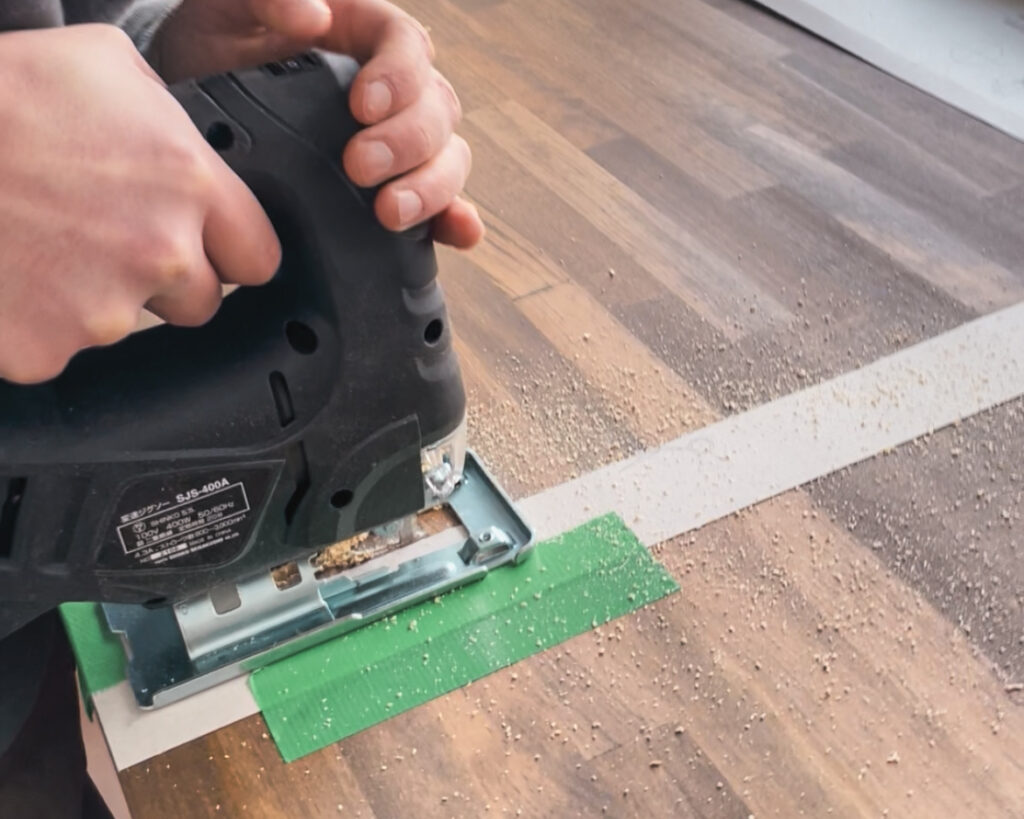
We chose a large black sunken sink from Ikea and ordered a faucet from Amazon.

Using a jigsaw allowed us to cut the sink-sized hole in the countertop.
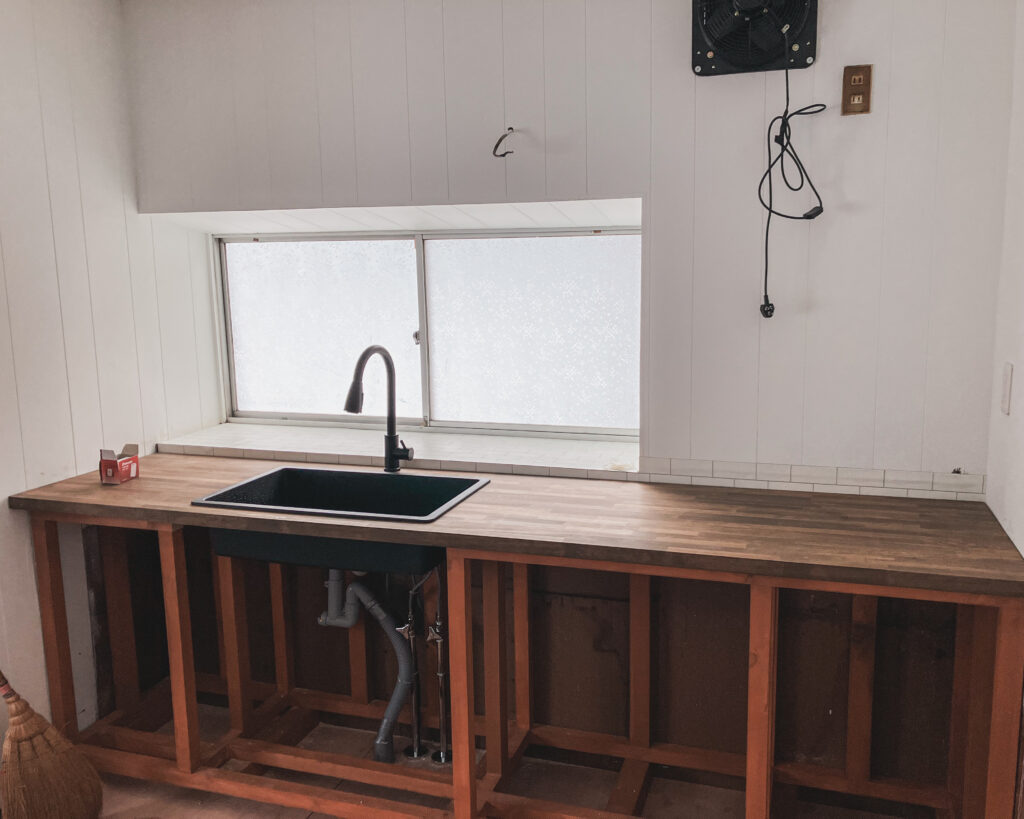
We then fitted the sink and faucet before filling any screw holes with wood putty.
👇Watch the video for more details!
With everything fitting well, our next job was to install the shelves and drawers. We made these from 12mm thick plyboard and used screws and glue to fix the edges of the drawers together. For the sliding mechanisms, we purchased these from Amazon and marked the same height on both sides before screwing them in. The fittings were then screwed into the appropriate points on the sides of the drawers allowing them to be inserted.
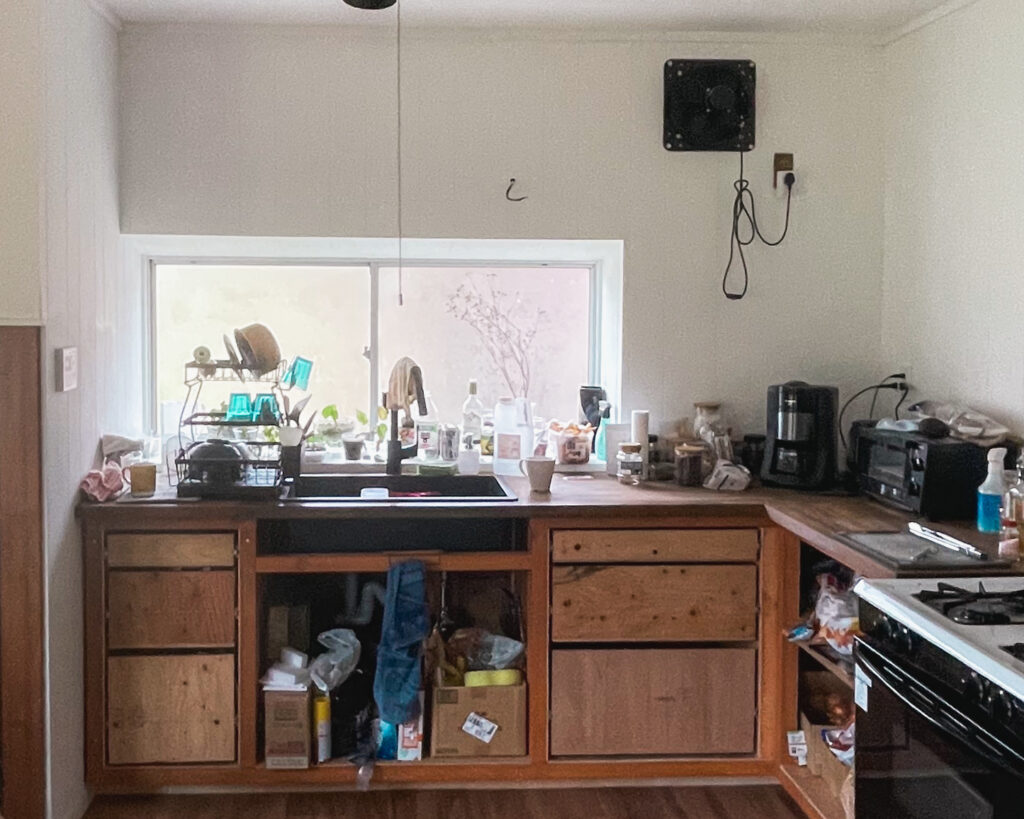
All of the drawers and shelves were treated with a polyurethane finish that gives them a cleaner shine. This is also handy for wiping the wood and will hopefully allow it to last longer. Or so we had thought …
It was halfway through our first winter that we noticed the black mould forming in the backs of the cabinets.
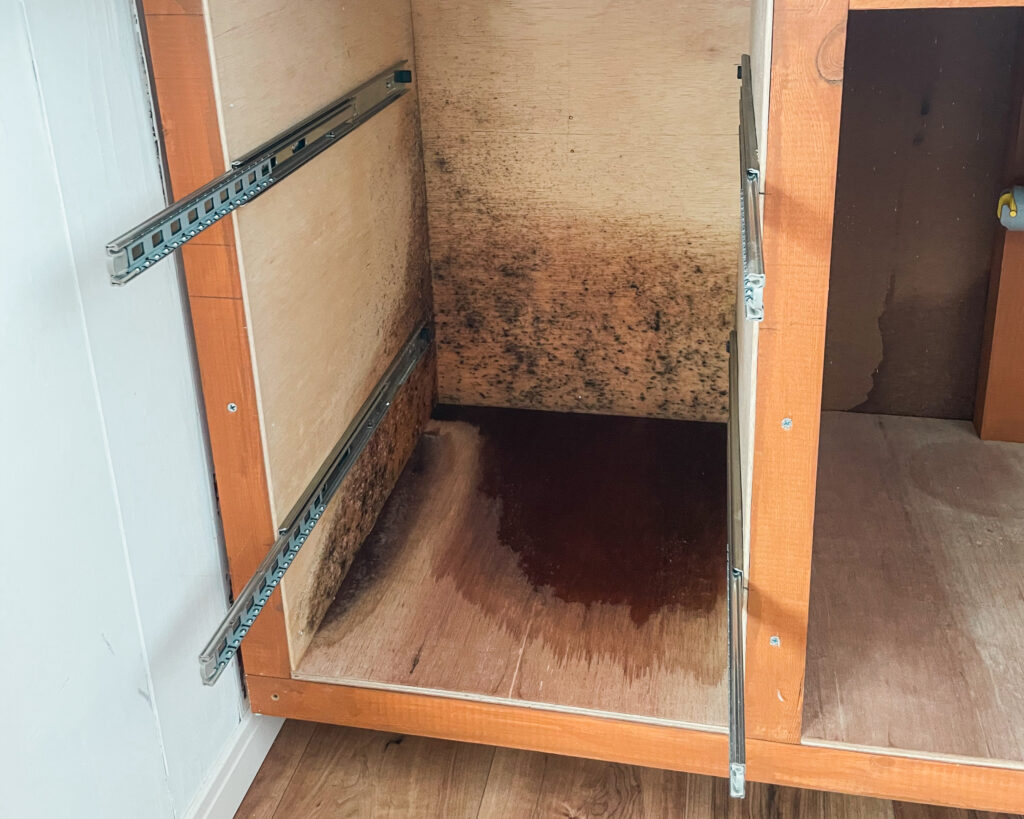
Our issue had been not insulating the exterior walls before putting the cabinets in. The lack of insulation allowed cold air to rush through tiny gaps from the wall cavities, and upon meeting the warm air indoors, condensation formed on the cold backs of the cabinets. This had gone unnoticed for over a month, hiding in the shadows at the back of our food cupboards. Immediately after noting the issue, we began cleaning the mould with solutions, but we could feel small holes where the cold winter air was still rushing in. We knew we would need to remove the kitchen to deal with the walls first.
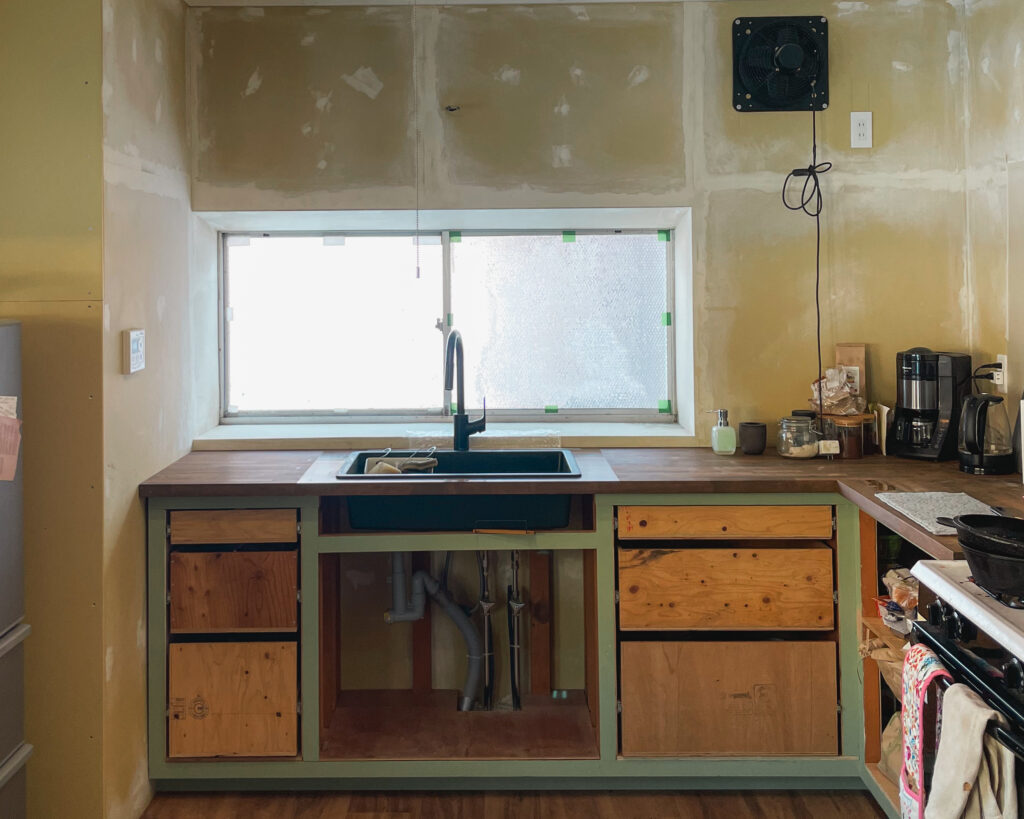
This was understandably frustrating after all the effort we had put into our homemade kitchen. We removed the kitchen cabinets and walls to fully insulate. This involved installing fresh studs and noggins for the plasterboard. With the walls back up, we gave it a few goes over with putty to fill in the cracks and screw holes.

Then, we were ready to put our kitchen cabinets back in. As the size of the space had changed with the new plasterboard, we had to cut down the frame and countertop to ensure a clean fit. This task required some exact measurements and took us some time before we were happy enough to cut everything down. It was a case of measuring twice and cutting once.
Once everything had been squeezed back into place, we painted the front of the frame in farmhouse green.
👇Watch the video for more details!
Another issue we encountered over the winter was water freezing in the faucet, causing it to break. Knowing that we live in an area that experiences freezing weather, we needed to get a more durable faucet suitable for freezing conditions. We ordered a faucet from Kakudai.
The kitchen is now comfortable and suits our needs. Our next task will be to tile the walls and make the faces and doors for all our drawers and cupboards.
We will update you on our progress as we continue working towards the finished kitchen.